-
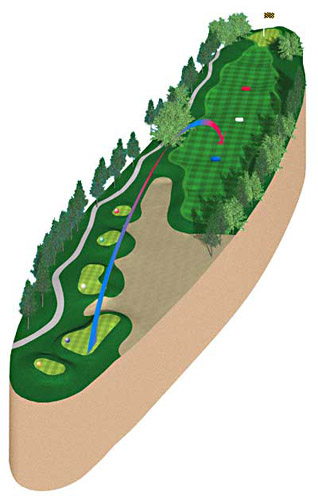
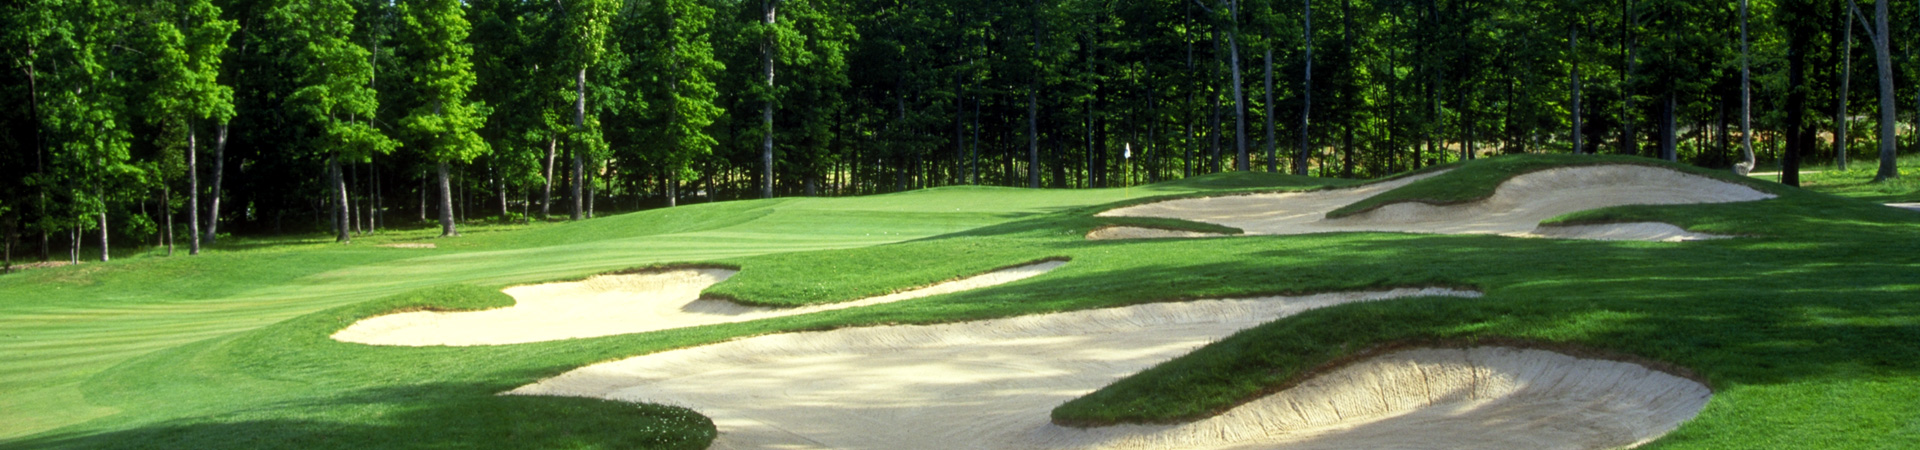
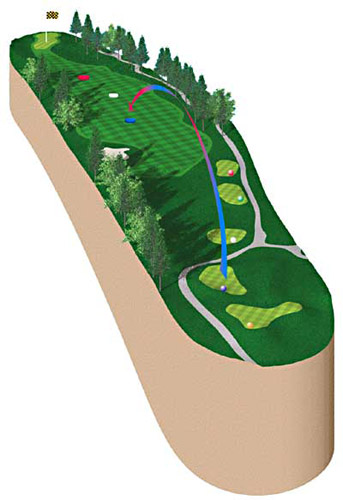
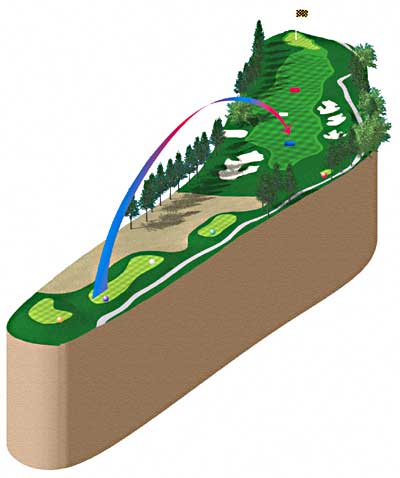
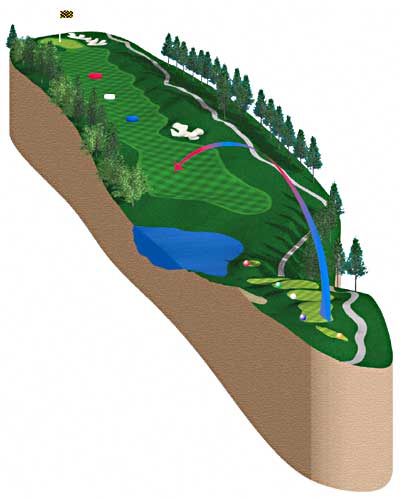
Hole #1
Par 4 | Handicap 13
The first hole is an uphill par 4 that plays slightly longer than the indicated yardage. A forced carry off the tee sets up a middle iron to a large, undulating green. Although it is without bunkers, this demanding hole sets the pace for a challenging front nine.
BOOM BOOM 408 Blue 388 White 356 Green 300 Red 275 -
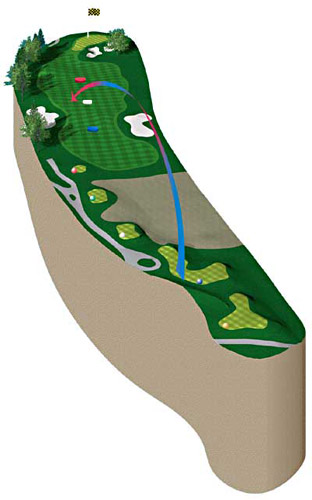
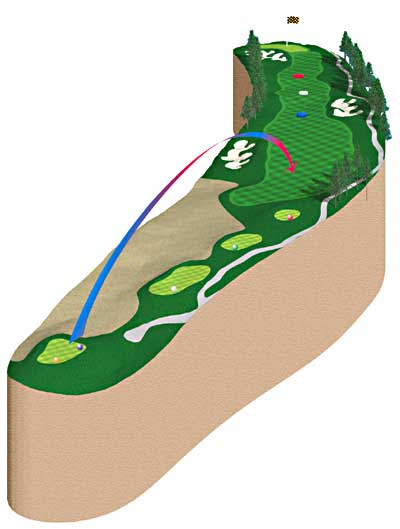
Hole #2
Par 4 | Handicap 11
The second is a medium length par four, which requires a tee shot that negotiates bunkers on both sides of the fairway. A short-iron approach must carry the greenside bunkers to a green that slopes from back to front.
BOOM BOOM 416 Blue 394 White 361 Green 304 Red 268 -

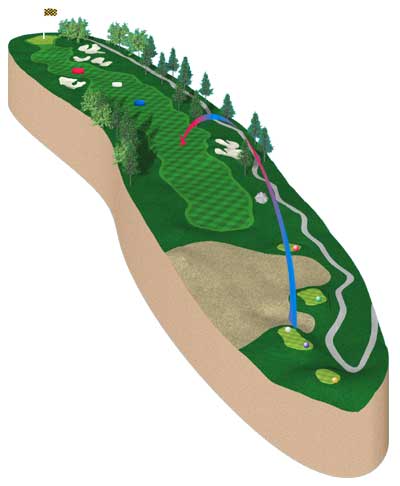
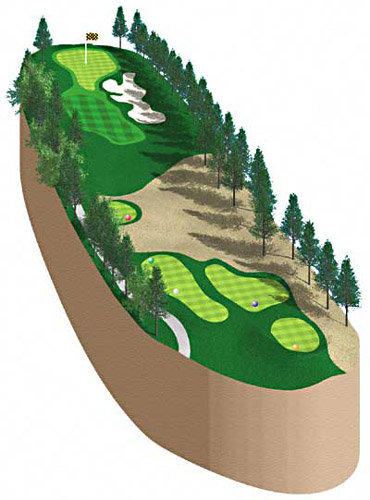
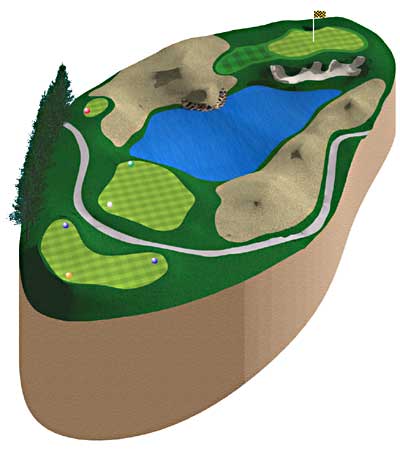
Hole #3
Par 3 | Handicap 5
Westfields' Signature Hole is this par 3, playing 223 yards from the Boom-Boom tees. The tee shot must avoid the lake to the left of the green. If you choose to bail out right, you may find the large greenside bunker. Three puts are common on the large, L-shaped green.
BOOM BOOM 223 Blue 197 White 155 Green 126 Red 76 -
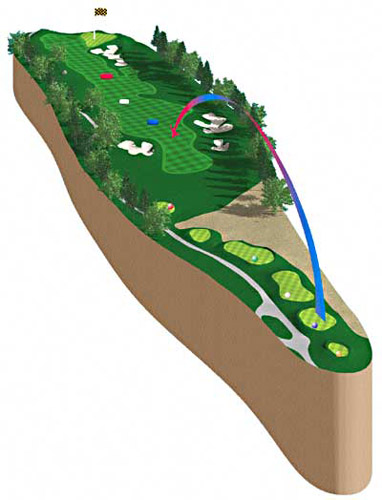
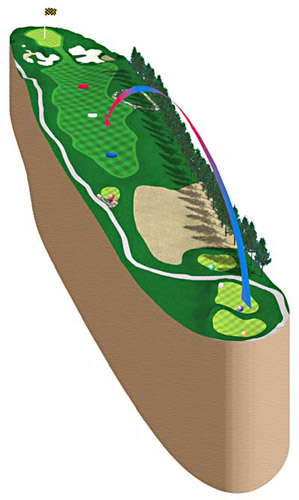
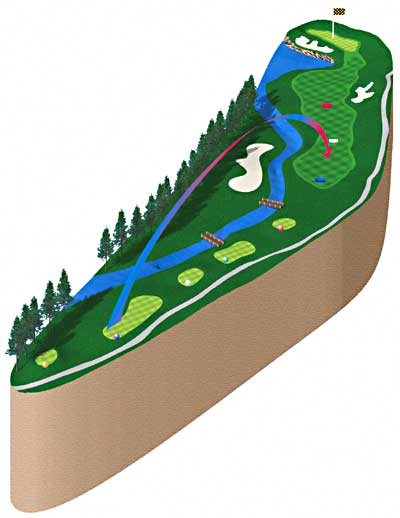
Hole #4
Par 5 | Handicap 7
The first of our three par 5s requires a straight tee shot between the large oak trees on the left and the receptive fairway bunker on the right. The second shot must avoid the fairway bunkers to set up a short-iron approach to the large, undulating green.
BOOM BOOM 570 Blue 541 White 520 Green 488 Red 451 -
Hole #5
Par 4 | Handicap 9
The fifth is the first of three long par 4s on the front side. A solid tee shot must avoid the fairway bunker on the left side. A long-iron approach follows to a long, narrow green with mounds on the left and a depression on the right. Par is a very good score.
BOOM BOOM 448 Blue 420 White 379 Green 331 Red 304 -
Hole #6
Par 4 | Handicap 3
This is the longest par 4 on the course, playing 473 yards from the Boom-Boom tees. A long straight shot must split the fairway bunkers to properly set up the long second shot. You can bail out to the left of the well-guarded green, but getting up and down from there is difficult.
BOOM BOOM 473 Blue 459 White 433 Green 392 Red 327 -
Hole #7
Par 3 | Handicap 17
The second par 3 on the front side is the 180-yard seventh. There is a severe drop-off on the left side of the green, which contains three deep bunkers. A large ridge running through the middle of the green will challenge even the best of putters.
BOOM BOOM 180 Blue 157 White 141 Green 128 Red 94 -
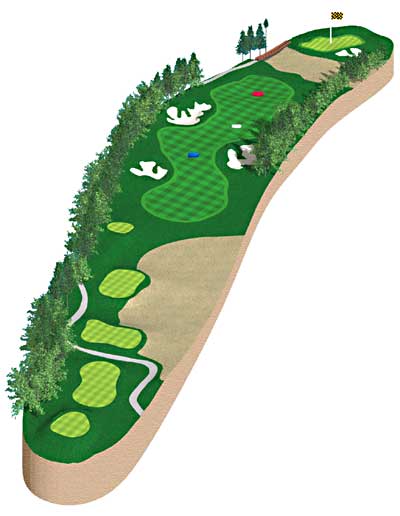
Hole #8
Par 4 | Handicap 1
This par 4 is Westfields' toughest hole. A tee shot down the left side of the fairway is required to avoid the large oak tree that guards the green's right side. The cluster of fairway bunkers and a large greenside bunker are ready to catch errant second shots. Four is an excellent score here.
BOOM BOOM 467 Blue 441 White 406 Green 382 Red 347 -

Hole #9
Par 4 | Handicap 15
The tee shot on the ninth hole must split the fairway or stay short of the well-placed fairway bunkers. A middle-iron approach shot must carry an environmentally-protected wetlands area. Three bunkers guard the medium-sized green. Four is always a good score on this hole.
BOOM BOOM 390 Blue 368 White 345 Green 299 Red 243 -
Hole #10
Par 4 | Handicap 12
The tenth is a medium length par-4 that favors a right-to-left tee shot. The ball will be slightly above your feet for a middle or short iron approach to the unprotected, two-tiered green. This is a good starting hole for the shorter, but challenging back nine.
BOOM BOOM 412 Blue 388 White 368 Green 312 Red 243 -
Hole #11
Par 5 | Handicap 8
This par 5 features a landing area with mounds in the middle of the fairway and a large bunker on the left side. A second shot to a sloping fairway sets up a short-iron approach to a difficult, undulating green. The large greenside bunker adds to the challenge.
BOOM BOOM 525 Blue 507 White 468 Green 408 Red 382 -
Hole #12
Par 3 | Handicap 14
The 12th is a tough par 3 with out-of-bounds along the right side. A large bunker guards the front right of this extremely challenging green. A large mound in the left-center of the green creates some impossible two-putt situations. Making par is very impressive.
BOOM BOOM 194 Blue 171 White 160 Green 145 Red 127 -
Hole #13
Par 4 | Handicap 10
The 13th features the course's only blind tee shot. A Civil War burial site comes into play on the right side. Deep, punishing bunkers guard the large, multi-tiered green. A back left pin brings a ravine into play; finding it guarantees a high score, so play for the center of the green.
BOOM BOOM 395 Blue 349 White 337 Green 308 Red 239 -
Hole #14
Par 4 | Handicap 18
This drivable par 4 is only 285 yards long from the Boom-Boom tees. A drive left center will feed down to the green for a possible eagle bid. However, a large bunker guards the green's front right side. With scores ranging from eagle to triple-bogey, this short hole provides plenty of excitement.
BOOM BOOM 285 Blue 264 White 250 Green 204 Red 150 -

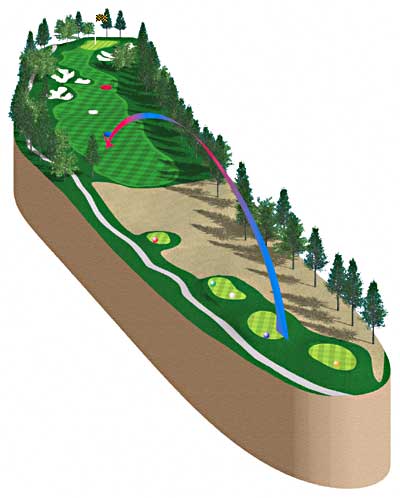
Hole #15
Par 5 | Handicap 4
The picturesque 15th requires a forced carry tee shot over a pond to a wide rolling fairway. A blind, uphill second shot must find the fairway to set up the approach shot to a large, three tiered green. Three accurate shots and one good putt can make this three-shot par 5 a birdie hole.
BOOM BOOM 554 Blue 530 White 501 Green 465 Red 421 -
Hole #16
Par 4 | Handicap 6
A creek guards the left side of this par 4 before emptying into a pond in front of the green. A right-to-left tee shot that avoids the right side bunker will set up a middle to short-iron approach. The wide but shallow green is a rather small target, yet putts of 50 feet or better are common.
BOOM BOOM 384 Blue 354 White 329 Green 291 Red 259 -
Hole #17
Par 3 | Handicap 16
Don't let the yardage on this short par 3 fool you; it is still fairly difficult. Tee shots must carry a small pond and a large greenside bunker to find the large green that sits diagonally to the tee box. Yardages increase as pin placements are moved from left to right.
BOOM BOOM 160 Blue 146 White 126 Green 106 Red 102 -
Hole #18
Par 4 | Handicap 2
This par 4 18th is a classic finishing hole. Only a straight tee shot will avoid the fairway bunkers and allow you to access the green. Second shots must carry a native grass waste area. Even if you reach this large, undulating green in two, two-putting for par is not guaranteed.
BOOM BOOM 443 Blue 422 White 399 Green 333 Red 289